Operation Guide
Setup
Connecting to a Network
Connect the Ethernet port to a local network with (outbound) Internet access.
Connect the AC power socket to AC power (110-240VAC, 50-60Hz)
Power up the PLT with the rocker switch in the back.
The PLT will power up, and the logo will display.
After displaying the Blue Clover logo, the home screen will appear.
Usage
Running a Test Plan
On the PLT, press the Start button. The PLT will begin cycling through the test plan.
If the test plan passes successfully, the PLT will display Pass.
If a test step fails, the PLT will display “Fail” and pause at that step.
Press the Continue button to go to the next step in the test plan
Press the Abort button to end the test.
At the end of the test, a report will automatically be generated and sent to PLTcloud.
If a label printer is attached, a label will be printed upon completion of the test plan (PASS or FAIL).
Reports
If at the end of the test, the PLT is unable to submit the test report to PLTcloud, it can be stored locally for later re-submission (Store-and-Forward).
Information about the reports stored locally can be inspected using the on-device user interface:
On the PLT, press the Menu button and then scroll to Reports.
Press the Select button
Manual re-submission can be triggered by clicking the the Sync button.
See also
Check for Update
On the PLT, press the Menu button and then scroll to Check for Updates.
Press the Select button
The PLT will recognize the staged Release and display Update Available.
Click the Update button.
The new deployment will download, and the PLT will restart.
Note
If the PLT does not find the new Release, it will display “No Update Available”.
If that happens, inspect the expected Release deployed to a PLT on the management Web console.
Internet Check
To verify the PLT’s network connectivity:
On the PLT device, press the Menu button.
Navigate to Internet Check using the arrow keys.
Press the Select button.
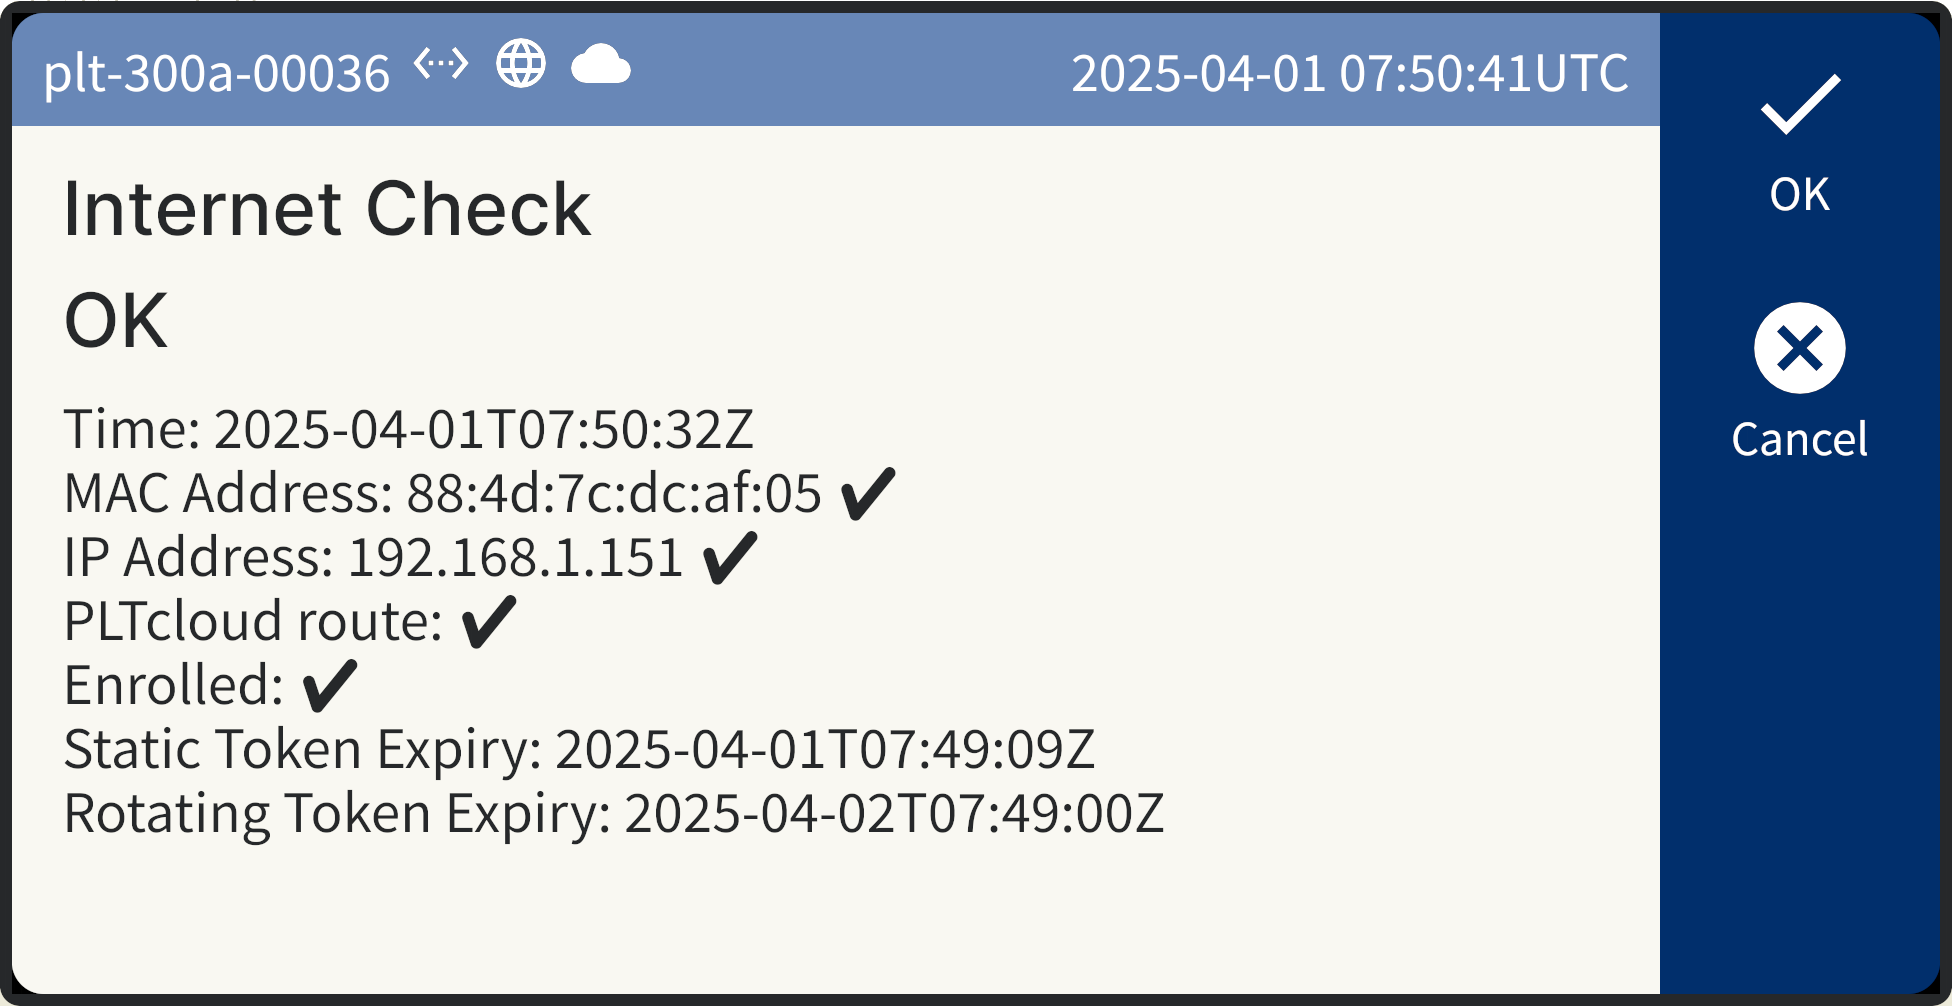
The PLT will display a summary of its current internet connectivity status.

Internet Check display on PLT-300A
Displayed information includes:
Time: Current UTC time.
MAC Address: The Ethernet MAC address of the PLT.
IP Address: Confirms if the PLT has acquired a local IP address.
PLTcloud route: Indicates whether the PLT’s Ethernet interface has a DHCP lease that includes routing to
api.pltcloud.com.Enrolled: Indicates whether the PLT is successfully enrolled.
Static Token Expiry: UTC expiry timestamp of the static token (may be in the past).
Rotating Token Expiry: UTC expiry timestamp of the rotating token (should be in the future).
See also