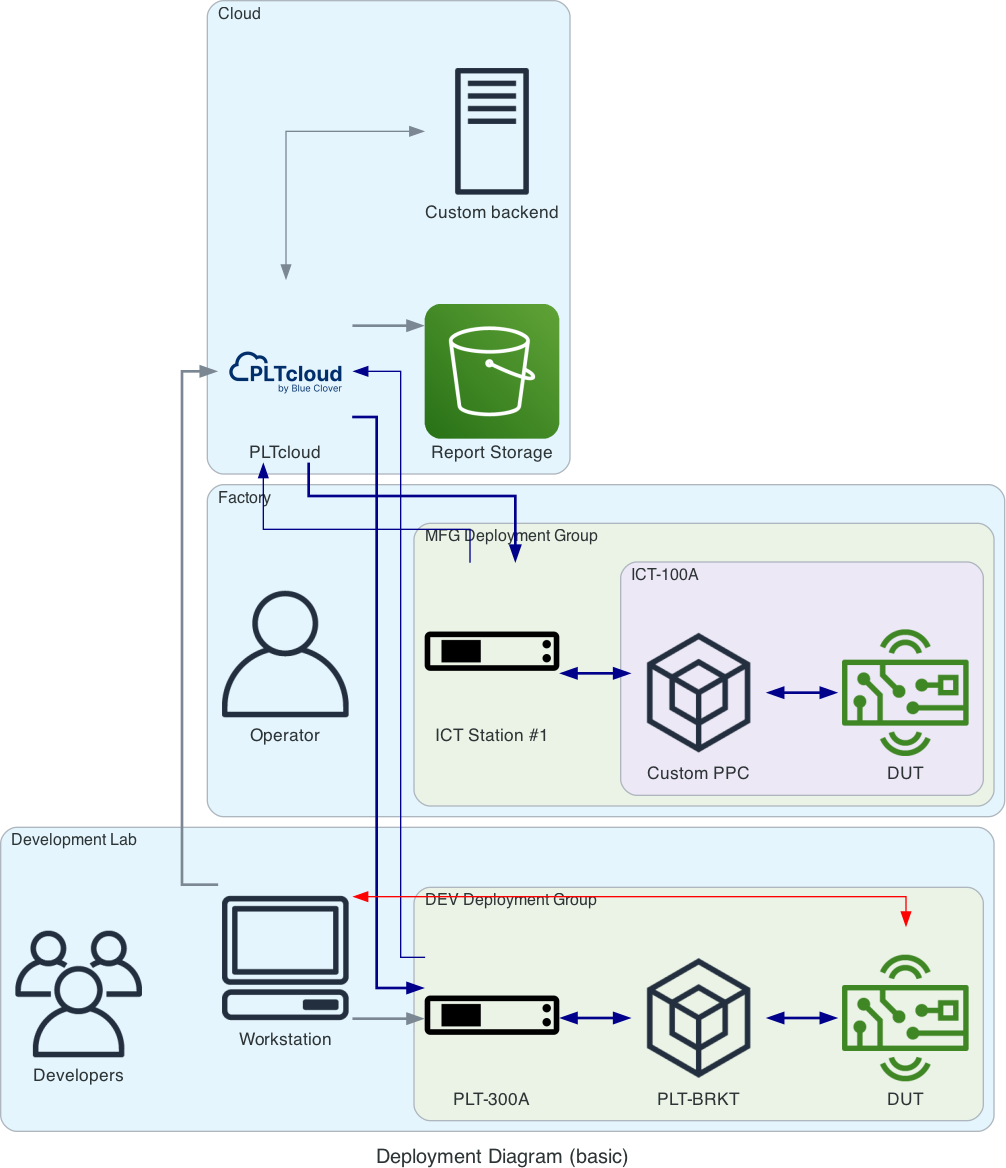
Report Connector
The Report Connector allows setting up PLTcloud to act as a data source for analysis and archivation.
Supported Destinations
At this point, PLTcloud supports Amazon S3 buckets as Report Destinations.
Data will not begin replication until you’ve successfully connected a destination to a project, and at least one test plan is executed for the project.
As part of the Enterprise plan, additional destinations can be supported.
Tip
The S3 bucket can be hooking up to various 3rd-party data pipeline (or ETL) tools and services, consolidating data from various sources into a single location.
Amazon S3 Destination
Prerequisites
An Amazon Web Services (AWS) account. Signing up is free - go to https://aws.amazon.com to create an account.
Permissions to create and manage S3 buckets in AWS.
Step 1: Create an Amazon S3 Bucket
Sign into AWS Console
Click Services on the top-left corner
Select S3 under the Storage section
Click the + Create Bucket button
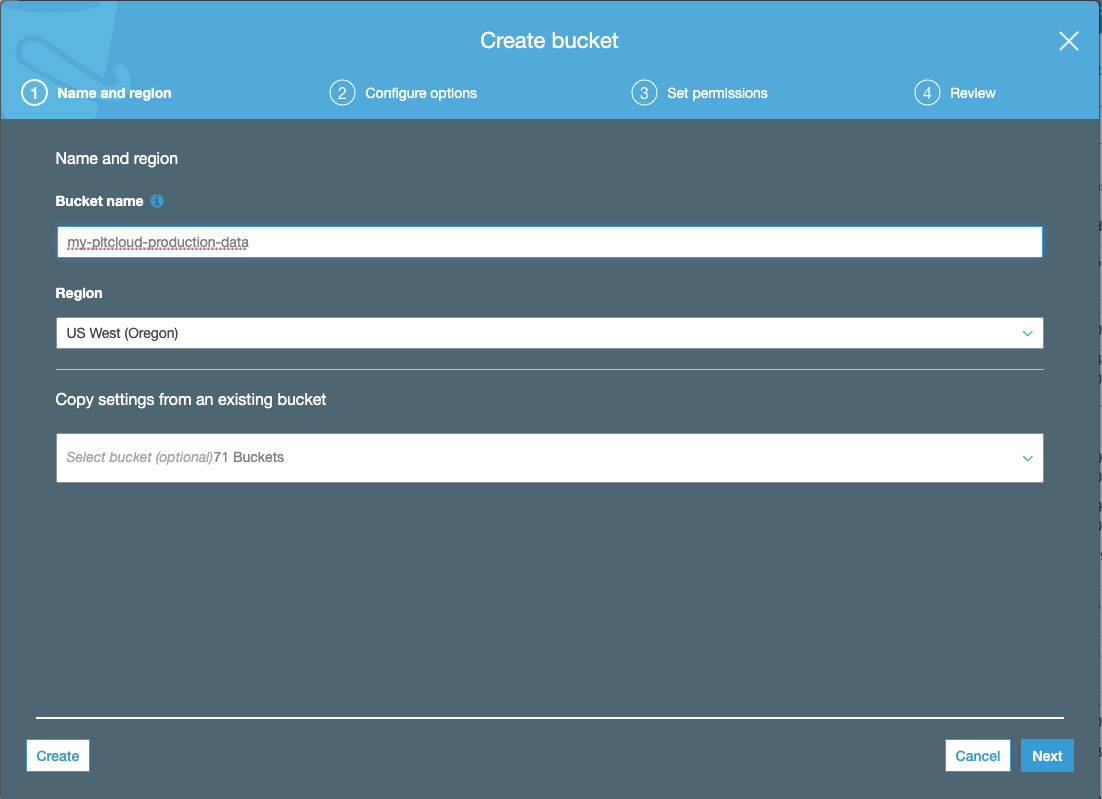
AWS S3 Bucket Creation
On the first screen, Name and region, complete the following:
Bucket name: Enter a unique DNS-compliant name for the bucket.
Region: Select the region you want the bucket to be located in.
Click Next
On the Configure Options screen, leave all default settings as-is, and click Next
On the Set Permissions screen, choose Block all public access and click Next
On the Review screen, verify all settings and click the Create bucket button.
Step 2: Set the Report Connector Destination in PLTcloud
If you aren’t signed into your PLTcloud account, sign in first.
Select the Project for which you’d like to set a Report Connector destination.
Navigate to Project Settings
Click on the Report Connector button
Click on the + Add Destination button
Fill in the fields as below:
S3 Bucket: Fill in the name of your S3 bucket (without any
s3://prefix)Region: Fill in the AWS region of your S3 bucket
Report Prefix: Optionally fill in a prefix (folder name) for the reports within the bucket
Select either
csvorjsonfor CSV or JSON reports
Step 3: Grant bucket access
Navigate to the Report Connector Destination detail page.
Expand the S3 Bucket Policy tab
Copy the S3 Bucket Policy JSON
Sign into AWS in another tab, if not currently logged in.
In AWS Console, navigate to the Permissions tab of the S3 bucket that serves as the Report Connector Destination.
In the Permissions tab, click the Bucket Policy button.
In the Bucket Policy editor, paste the bucket policy code from PLTcloud.
Click the Save button when finished.
At this point, test reports should start to appear in the S3 bucket a few seconds after a test plan associated with the Project is executed on a PLT.